
Understanding Home Electrical Wiring Types
Common Cable Materials and Conductors
Every year, South African fire services respond to over 10,000 residential blazes traced back to faulty wiring. That statistic turns your choice of electrical cable for house installations into a safety decision, not a bargain bin find. Copper remains the dominant conductor material. It resists corrosion, carries current efficiently, and tolerates repeated bending. Aluminium appears in older wiring, but SANS 1010-1 restricts it to larger cross sections because aluminium creeps under terminal pressure.
Most domestic installations use a few cable families:
- PVC insulated singles for conduit runs
- TPS, tough plastic sheathed cable, for surface or plastered runs
- Armoured cable for outbuildings and garden lighting
Solid copper cores suit fixed wiring. Stranded conductors suit flexible connections inside distribution boards. Match the electrical cable for house circuits to the ampacity, environmental exposure, and installation method. A mismatch generates heat. Heat accelerates insulation breakdown. Insulation breakdown causes fires.
NM-B vs. UF-B vs. THHN
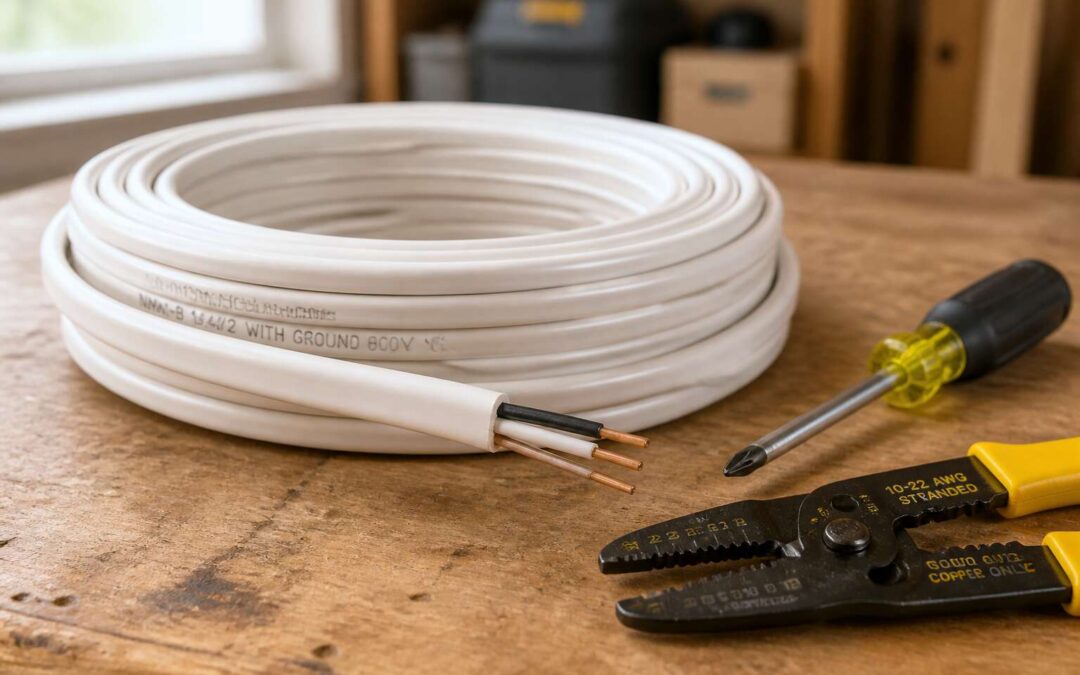
South African shops stock American wire labels more often than most buyers realise. NM-B, non-metallic sheathed cable, wraps two or three insulated conductors in a PVC jacket for dry interior runs. UF-B looks similar but adds a water-resistant casing for direct burial. THHN, a single thermoplastic-insulated wire, belongs in conduit.
Selecting the right electrical cable for house installations starts with matching the type to the environment:
- NM-B for inside walls and ceiling voids
- UF-B for underground feeder lines to sheds and garages
- THHN for conduit runs where individual conductors get pulled through
Each family serves one purpose well. Swap them and you invite moisture damage or fire risk! I have seen imported appliances with these labels confuse local electricians. South African wiring rules use different names, but the logic behind TPS and armoured cable mirrors these American designs.
Wire Gauge and Ampacity Explained
Choosing the right electrical cable for house wiring starts with understanding gauge and ampacity. In South Africa, wire sizes use metric cross sections. A 1.5 mm² conductor handles around 15 amps, while 2.5 mm² pushes that to 20 amps. Push more, and the insulation heats, which is how most domestic fires start.
My rule is simple: never guess ampacity. The number on the cable tells you area, not capacity. The load determines the gauge, and the gauge determines the breaker.
- 1.5 mm² for lighting circuits up to 15 A
- 2.5 mm² for socket outlets up to 20 A
- 4 mm² for stoves or geysers up to 30 A
These values assume normal installation conditions. De-rating factors, such as ambient temperature or bundling, drop those figures. That is why professionals check tables before they pick an electrical cable for house projects.
How to Choose the Right Electrical Cable for Your House
Assessing Your Household Power Needs
Nobody wakes up thinking about load shedding, but everyone notices when the lights go out. Before you buy electrical cable for house projects, you need to measure your household’s appetite for power. That means adding up the watts every appliance devours simultaneously, not just the kettle and the geyser. The usual suspects deserve special attention:
- Geyser
- Oven and hob
- Air conditioner
- Pool pump
If you undersize your conductors, your breaker will remind you at the worst possible moment. If you oversize them, you waste money on copper that sits idle. Do the arithmetic first, then let the numbers dictate your cable choice. This step saves headaches later. A proper load audit makes your electrician’s job easier and your wallet happier.
Matching Cable Size to Circuit Breaker
Choosing the wrong electrical cable for house wiring is a mistake that surfaces as heat. A circuit breaker is sized to protect the conductor, not the appliance. If the breaker’s rating exceeds what the cable can carry, the breaker stays silent while insulation degrades. The arithmetic is simple. Match the breaker to the cable’s ampacity, then match the load to the breaker.
In South African homes, the common combinations look like this:
- 15 amp breaker, 1.5 mm² cable for lighting
- 20 amp breaker, 2.5 mm² cable for socket outlets
- 30 amp breaker, 4 mm² cable for geysers and stoves
Use the cable’s continuous current rating as your ceiling. When the numbers disagree, the lower figure wins. That is the only safe ground.
Indoor vs. Outdoor Cable Ratings
South Africa’s sun beats down on roof cables and hidden wall conduits alike. The electrical cable for house use must answer two different environments. Indoor cable rests in cool, dry cavities, shielded from weather. Outdoor cable faces UV rays, rain, and sharp temperature swings. The jacket rating matters more than the copper core.
Roof spaces add a third layer. Heat builds behind tiles and insulation, so a cable that survives a wet garden trench may soften in a summer attic. The rating stamped on the sheath is a promise tied to location.
Indoor and outdoor cables differ in these ways:
- Outer jacket composition: UV-stable compounds for direct sun, flame-retardant compounds for interior walls
- Moisture tolerance: fully sealed against rain or simply resistant to humid air
- Installation pathway: buried in soil or pulled through conduit
The electrical cable for house wiring must be judged where it actually runs. Two meters of sunlight can change the requirement entirely.
Color-Coding and Insulation Types
South Africa’s wiring regulations demand a strict palette. When you pick electrical cable for house, the colors tell you the conductor’s role. Brown means live, blue neutral, green and yellow earth. This code prevents a simple misread from becoming a dead short.
Insulation types carry their own signals. PVC handles everyday heat, but XLPE tolerates higher temperatures and resists chemical damage. The jacket’s thickness also matters. Thin insulation saves money, but it cracks under vibration.
- Brown or red: live
- Blue or black: neutral
- Green and yellow: earth
A mismatched color usually points to a DIY repair. That is dangerous! Match the insulation to the environment, then trust the code.
Safety Considerations and Code Compliance
National Electrical Code (NEC) Basics
In South Africa, the electrical cable for house must satisfy both fundamental safety principles and local wiring regulations. The National Electrical Code (NEC) provides a useful baseline for grounding, protection, and permissible installation methods, even though SANS 10142 is the binding standard here. Proper routing, physical securing, and junction box fill are non-negotiable. A cable that is strained or improperly supported becomes a hidden danger.
- Maintain the required bending radius to prevent insulation stress.
- Use approved fittings and clamps at every termination point.
- Keep cables separated from heat sources by mandated clearances.
Compliance protects against fire and electrocution. For complex circuits, defer to a certified electrician who understands the code in practice.
Grounding and Polarization Requirements
A single reversed polarity connection can turn an innocuous appliance into a live trap. In South African homes, the earth conductor within your electrical cable for house is not a suggestion, it is a safety requirement. Without proper grounding, a fault current has nowhere to travel, leaving metal chassis energised.
Polarization demands consistency from the distribution board to the socket outlet. The live, neutral, and earth must each maintain their designated position. A certified installer verifies this with a phase rotation tester, not by assumption.
- Dedicated earth conductors back to the main board.
- Correct live, neutral, and earth orientation at every outlet.
- Independent insulation resistance for each circuit.
These checks prevent the subtle drift that causes shocks. I have seen old wiring where the neutral and earth were bridged, a persistent risk.
Avoiding Overloading and Fire Hazards
The surge protector on your distribution board cannot rescue a cable that is undersized. When the current demand exceeds the conductor’s capacity, heat builds inside the walls. The insulation degrades slowly, then fails suddenly. In South African homes, the electrical cable for house must comply with the SANS wiring code, which sets clear limits on conductor loading. A breaker set too high for the wire gauge creates a serious fire risk. The electrical cable for house also needs to handle the daily load of geysers, kettles, and space heaters without overheating.
Load calculations are not guesswork. Every socket and every appliance draws current that must be accounted for. The electrician should verify the total connected load against the cable’s rated ampacity.
Common warning signs:
- Warm faceplates or discoloured sockets
- A persistent smell of burning dust
- Circuit breakers that trip without an obvious cause
These indicators point to a cable working beyond its limits. The regulations exist to protect the structure and the people inside it.
When to Hire a Licensed Electrician
A cable failure is not a spectacle. It is a quiet, incremental decay, a fatigue that accumulates in the copper and the polymer sheath until one afternoon, the circuit simply gives out. The terror of a house fire often begins as a faint warmth behind a wall. South African regulations under the SANS wiring code are not suggestions. They are measured thresholds for conductor loading and thermal limits, designed to anticipate the strain of a geyser cycling at dawn or a kettle boiling during a storm.
Professional oversight is the difference between a system that survives and one that merely appears to function. A licensed electrician examines the specific electrical cable for house installations, verifying that all connections and terminations meet compliance standards. They ensure the protection mechanisms align with the actual, documented load. Here is what a professional will check:
1. Earth leakage unit sensitivity and response time
2. The physical condition of the cable insulation and sheathing
3. Tripping curves of the circuit breakers versus the cable’s rated ampacity
The cost of an inspection is negligible against the finality of a short circuit. Do not rely on the aesthetic appeal of a clean distribution board. The true safety of your home lies in the invisible, regulated details of the electrical cable for house, which only a trained eye can certify.
Permits and Inspections
Every province in South Africa treats electrical work as a legal event, not a DIY project. Before you run a single metre of electrical cable for house, the local municipality must approve the installation plan. This is not paperwork for its own sake, it is a documented trail that protects your property title and your insurance claim.
- First fix, when the electrical cable for house is visible and can be tested for sheath damage
- Second fix, after all terminations and connections are sealed
- Final audit, which results in the Certificate of Compliance
Without those sign-offs, your insurer can reject a fire claim outright. The SANS 10142 wiring standard requires the inspector to verify conductor insulation resistance and earth continuity before the walls close up.
Installation Best Practices for Home Wiring
Stripping and Terminating Cable Ends
The final centimeter of a cable often decides the safety of everything behind it. A poor termination accounts for most electrical failures in residential settings. When preparing your electrical cable for house wiring, always use a purpose built stripping tool. This prevents nicking the copper strands, which creates hot spots. After removing the insulation, inspect the conductor for smoothness. Any scoring means you must cut back and start again.
Terminating requires attention to torque and seating. Screw terminals should be tightened securely but not overstressed. For solid wire, wrap the exposed conductor three quarters of the way around the screw. For stranded wire, twist the strands before inserting into the connector.
The procedure includes three checks:
- Match the strip length to the terminal specification.
- Use ferrule connectors for fine stranded conductors.
- Pull test every connection after tightening.
Running Cable Through Walls and Conduit
One wrongly drilled hole can compromise an entire circuit. When you feed an electrical cable for house through a wall cavity, the route deserves as much attention as the gauge and the breaker. Drill through the centre of the stud, keeping at least 32mm from the face of the framing. That margin stops a screw from piercing the insulation later. Pull the cable steadily. A sudden jerk can stretch the sheath and break individual strands.
Conduit changes the equation. Keep the total bend between pull points under 360 degrees, and use a pulling lubricant on runs longer than five metres. Overfilling a conduit traps heat, so apply the 40% fill rule before you start.
- Secure the cable to the wall every 1.4 metres.
- Leave a service loop of 150mm at each junction box.
These small decisions decide whether the cable survives the walls it calls home.
Securing and Supporting Cable Runs
A cable left to dangle is a cable waiting to fail. When you run an electrical cable for house, the support system matters as much as the conductor size. I have opened junction boxes where loose wires had fretted against the metal edge until the insulation wore thin. That damage rarely appears on a test meter.
Use purpose made clips or saddles that match the cable diameter. Nails and cable ties are temporary habits, not permanent solutions. Keep the run free of tension while you work. A gentle curve beats a sharp kink every time. For vertical drops, secure the electrical cable for house at the top and bottom of each storey, then every 1.2 metres in between. Firm support prevents the small movements that turn into big failures.
Testing Connections Before Closing Walls
The moment before you seal a wall is the last honest chance to verify your work. A multimeter becomes your best ally here, revealing faults that the human eye can easily miss. Test every connection for continuity and correct polarity before the drywall goes up. This is not about finding fault with your labour; it is about building confidence in the hidden network that powers your home. An electrical cable for house that carries a silent imperfection becomes a costly problem once entombed in plaster.
I recall a job where a simple loose neutral connection caused intermittent flickering for months after the walls were finished. The remedy was far more expensive than a simple re-termination would have been. To save yourself that headache, run these checks while everything is still accessible:
– Verify each outlet has power and correct wiring orientation.
– Confirm all switches control the intended fixtures.
– Test for proper grounding at every metal box.
– Check for any accidental shorts between conductors.
A quick sweep with a voltage tester catches most issues, but a full resistance test on each run offers real peace of mind. The plaster will dry and the paint will cover the scars, but the integrity of the system relies on what you do right here, right now. Take the extra ten minutes per circuit. The silence of a perfectly functioning system is worth the effort.
Upgrading and Replacing Old Electrical Wiring
Signs Your Home Wiring Needs an Upgrade
Few homeowners think about what lies behind their walls until something goes wrong. The electrical cable for house installed thirty years ago often has insulation that crumbles at a touch. Modern appliances draw more current than those old circuits were designed to handle.
- Your breaker trips repeatedly without an obvious cause.
- Outlets feel warm or show scorch marks.
- Lights flicker when the kettle or geyser switches on.
- A faint burning smell lingers near switchboards.
- You still have ungrounded two-slot outlets.
Each symptom points to deteriorating conductors or undersized wiring. When the protective sheath degrades, copper strands become exposed and can create intermittent connections. These changes happen slowly, yet they affect every device plugged into that circuit.
Aluminum vs. Copper Wiring Replacement
Old aluminum wiring was common in the 1970s. It fails quietly, and by the time you notice, the damage is done. Removing it requires more than just swapping cable. Every splice, every terminal, every fixture must be inspected. Copper does not flex or corrode like aluminum, so it remains the logical replacement.
Here is why copper wins:
- Lower resistance means less heat.
- No oxide layer forms on the conductor surface.
- Termination points stay tight and safe.
When you buy an electrical cable for house rewiring, choose copper with proper insulation. The upfront cost is higher, but the lifespan is decades longer. In South Africa, a mixed aluminum and copper system invites galvanic corrosion. Never join the two metals directly at a junction box. Use a rated connector if you must make a transition, though full replacement is best.
Adding New Circuits for Modern Appliances
Your distribution board is a 1970s museum piece. The electrical cable for house inside it was rated for two lights and a single socket. Now you want a geyser, an induction hob, and a dryer all at once. That old conductor is not just tired; it is genuinely dangerous.
Upgrading to modern circuits means pulling a dedicated line for each heavy appliance. The oven gets a 6 mm² cable, the geyser gets a 2.5 mm² run. You might even need to install a separate feeder for the air conditioner. Each one breaks off directly from the board, no shared branches.
- Pull a new cable for the stove and the geyser.
- Install a dedicated breaker for each.
- Time together with the and terminals.
The result is a system that meets today’s loads without flipping a breaker when you vacuum. You will notice the absence of warm face plates on your outlets, which is a quiet victory.
Smart Home Wiring Considerations
Upgrading an old home’s wiring often uncovers surprises. Buried junction boxes, frayed insulation, and undersized conductors hide behind plaster and paint. Replacing these tired runs with new, correctly rated electrical cable for house systems removes the risk of overheating and arc faults. A full rewire provides peace of mind that the infrastructure matches modern consumption patterns.
Smart home features add another layer to the wiring plan. Automated lighting, security cameras, and Wi-Fi repeaters all require stable power and data pathways. The electrical cable for house must accommodate these low-voltage systems alongside traditional 230V circuits. Separating data lines from power cables prevents interference and ensures consistent performance. A structured cabling approach simplifies future additions.
Installing a smart panel allows remote monitoring of each circuit. Homeowners can track usage and identify potential issues before they become serious problems. The integration of sensors and automation requires clean, dedicated runs. Consider the entire ecosystem during planning:
– Allocate spare conduits for future technology upgrades.
– Use shielded cables for data transmission to avoid signal degradation.
– Label every conductor at both ends for straightforward maintenance.
The electrical cable for house becomes the backbone of an intelligent living space. Planning for smart systems during a renovation saves time and frustration later. A robust network of circuits and data lines supports both current needs and tomorrow’s innovations without rework.